Little did I know it would turn the kitchen into a danger zone for about a week and that all but the first and last two batches would result in rocks or tiny bread volcanoes.

Scone Troubleshooting (And How Not to Bake Scones)
Once I got the recipe down (and found that you really do have to use cutters and not just roll them into little balls), they came out wonderfully. The last batch was crisp on the outside and really light, airy, and moist on the inside. Here are some things I did towards the end to make things easier (and some things to avoid).
Frozen Butter and Cold Dough
This is probably what made it the easiest, mostly because it makes the scones super easy to work and cut and helps them retain their shape in the oven. If your dough is too warm, it causes your scones to rise, then spread, eventually hardening into rocks. (I do mean rocks, I dropped one on the floor and it didn’t so much as crumble.)
You’ll want to freeze the butter for about an hour beforehand (or at least until it gets fairly hard), cut it into little cubes, then work it into your dry ingredients. You can do it with your hands, but I found that the blender worked the best; just give it a pulse or two when mixing the frozen butter cubes. Don’t overwork it. If you have trouble getting it to mix in a few pulses, just use your fingers.
I also popped the dough in the freezer for about 15 minutes after I cut it into circles while I was making the egg wash and getting the toppings out. They retain their shape and rise a bit higher with cold dough. (If you freeze it overnight or to bake another time, you’ll want to let them sit out for about half an hour.)
Whole Milk or Heavy Cream
The cream made the scones a bit dense, but the whole milk resulted in more airy scones. This part just comes down to preference -- most of the scones in the bakeries here aren’t quite as light and crispy and have a sort of coarse consistency.
If you’re looking for a non-dairy alternative, cashew milk is about as creamy as whole milk and makes an excellent substitute. I haven’t tried other substitutes like coconut or almond milk.
Toppings and Additional Flavors
Coarse sugar and almonds make a great topping for these scones! You don’t need to press them into the dough to get them to stick -- just place them on after generously applying your egg wash.
I used vanilla and almond extract to add a little more flavor to them, which also makes them taste a little sweeter. I don’t recommend adding much more sugar than what’s in the recipe unless you’re cutting the extracts.
On Baking Powder and Salt
The recipe calls for a tablespoon of baking powder, which tasted a little bitter in one of the earlier batches. I added a quarter teaspoon of salt, but add a touch more salt if your scones still taste a little bitter. It’ll cut the bitterness and enhance the almond flavor (especially if you’re using almond flour instead of all-purpose).
You can add a tiny bit more baking powder if you’re trying to get them to rise more, but I don’t recommend adding much more lest you wind up with tiny bread volcanoes that will eventually flatten out.

Substituting Almond Flour (And Other Flour Types)
The second to last batch came out a little dense but was still really good. I substituted all-purpose flour with an almond flour mixture (almond flour, cinnamon, cloves, ginger, and allspice). The texture was a little more coarse and dense, but still wonderfully moist on the inside and crispy on the outside. This makes a good gluten-free alternative if you don’t want to use wheat flour, and it’s easy to substitute -- just replace the flour in the recipe below with 2 cups of almond flour.
You can also substitute most other types of flour without a problem. Just keep in mind you might need to adjust the amount of flour, milk, and baking powder to compensate for how heavy your flour is. (More baking powder, less milk -- things like almond flour are heavier and have more moisture than wheat flour.) The almond scone recipe below is fine as-is with just the increase to 2 cups of almond flour, but you might have to play around with ratios on other types of flour.
What will end in disaster, however, is if you don’t actually know what’s in your canisters. (Speaking from experience with an earlier batch, when I somehow wound up with self-raising flour.)
What to Drink with Almond Scones
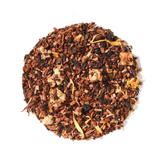
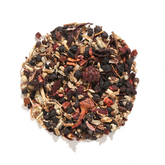
I had lots of Autumn Almond Chai to get me through this recipe, but any chai, spiced, or nutty-tasting tea pairs well with this one. Vanilla Sugar Cookie herbal tea doesn’t need anything added and goes wonderfully with these.
If you’re looking for an almond tea to pair with this almond scone recipe, there are a few: Toasted Nut Brûlée and Porch Sippin’ Pecan are both delicious. If you prefer no caffeine, No Obligations is a decaf maple/almond blend.
And while I’m a bit biased towards chai, my absolute favorite with this is Reading Nook.

Almond Scone Recipe
Ingredients:
- 1 and 3/4 cups of all-purpose flour (extra for surface dusting)
- 1/3 cup of granulated sugar
- 1 tablespoon of baking powder
- 1/4 teaspoon of salt
- 6 tablespoons of frozen butter
- 1/3 cup of milk (And extra, in case your dough is too dry + 2 tablespoons for the egg wash)
- 2 teaspoons almond extract
- 1 teaspoon vanilla extract
- 1 egg
- Sliced almonds for topping
- Coarse sugar for topping (optional)
Directions:
Preheat the oven to 450 F and line a cookie sheet with a silicone baking mat or parchment paper.
In a large mixing bowl, whisk together flour, sugar, baking powder, and salt.
Put frozen butter in a blender and pulse a few times, or chop into little cubes. Toss into the flour mixture.
Break the butter up and thoroughly mix into the flour (with your hands is easiest).
In a small mixing bowl, mix together milk, vanilla, and almond extract. Using a fork, slowly pour the liquid into the dry mixture and stir until it comes together and there are no longer floury bits. (Don’t overwork it -- you’ll want to work quickly and make sure the dough stays cold.) Using your hands, press it together into a ball.
Dust a clean surface with flour and put the dough on the surface. Knead gently until your dough comes together and looks smooth, but is still sticky. Dust flour over the top. If it’s too dry or doesn’t hold together, add a tablespoon of milk at a time until it holds together.
With a rolling pin, flatten the dough until it’s about 1 inch thick. Use a 2 and 1/2-inch circle cutter coated in flour (or the closest you have) to cut out scones. You should be able to just press and lift. After you can’t cut any more out, roll the scraps into a ball and repeat.
Place the scones on the cookie sheet. You should have 6-8 of them by the time you’re done. Put them in the freezer for about 15 minutes while you make the egg wash.
In a small bowl, whisk together an egg and 2 tablespoons of milk.
Take your scones out of the freezer and coat with the egg wash. Then, top with almonds and coarse sugar if desired.
Put your scones in the oven and turn the oven temperature down to 400 F. Bake until golden, about 12-15 minutes. They should rise quite a bit and puff out just a little bit. Don’t worry if they crack on the sides a little; as long as they went in cold, they’ll retain their shape.
Take them out of the oven and let cool for a couple of minutes. Serve with butter, cream, or honey. (I also like to mix butter, honey, and cinnamon for a nice spread!)
Looking for more scone recipes? We have other delicious scones on the blog, like Dark Chocolate Red Currant Scones and Chai Chocolate Chip Scones.

![Spring Break Tea Variety Pack [6-Pack Variety of Flavors]](http://www.plumdeluxe.com/cdn/shop/files/spring-break-pack.jpg?v=1740682266&width=165)

